Showing posts with label It's My Party DSP stack. Show all posts

Thursday, April 14, 2016

You're the Apple of My Eye Thank You Cards!


Here's another stamp set that took me a long time to warm up to. Apple of My Eye is cute, bold and works well with bright colours, but until I decided to mask the images so I could layer them, I wasn't really thrilled with the style. But since I love anything citrus, I gave them another try for some customer thank you cards. The stamp set has a great thank you sentiment and it's perfect for those citrusy oranges and yellows and greens.


One day left before the weekend. What are your plans? Anybody planting their garden?
See you tomorrow with another As You See It Design for the Challenge.


Click on the links below to take you to my On-Line Store, where you can read about, look at, and purchase if you wish, the products used to make this card today.


Product List

Wednesday, April 6, 2016

Corner Flip Card with Birthday Blossoms


During my craft retreat over the past weekend, I was working on class samples and challenges for different challenge blogs. Since the class theme is fancy folds, one design that I wanted my attendees to learn was the Corner Flip Fold. I started out using the colour scheme from last week's Global Design Project's challenge, but then realized that it would end too soon for me to participate this time:


I didn't end up really liking those colours the way I used them for this design, so I chose some different colours that I like much better.

It's a little more subdued - more me! I used Mint Macaron, Tip Top Taupe and Sahara Sand with a pop of Watermelon Wonder. Here's a more detailed look at this fancy fold:


  • With a Corner Flip card, you basically cut out two partial sides of a 3" square on the front of the card and that enables you to flip  the corner over, after which you design it. There is a great tutorial here, by Dawn Olchefske, one of my favourite Stampin' Up! bloggers. The only thing that I did differently was to glue down a 5 1/4" x 4" piece of It's My Party Designer Series Paper before making the cuts.
  • I used the Birthday Blossoms stamp set. I love that the flower can be punched out with the Pansy Punch and I also really like the sentiments! It's a very versatile stamp set.
  • One hint on using the flower image. The Pansy Punch is not symmetrical so you need to figure out which petal you want stamped at the bottom of the page so that you can easily line it up with the punch. In this photo, the petal that is at the bottom of each image here happens to be the one that should be at the bottom of the cardstock when you stamp it so that it will line up perfectly with the punch.
Here's the inside, all images from the Birthday Blossoms set:


Give it a try. It really is quite easy and it's fun to do!


Click on the links below to take you to my On-Line Store, where you can read about, look at, and purchase if you wish, the products used to make this card today.


Product List

Friday, March 4, 2016

A Party Without Cake is Just a Meeting for As You See It Challenges


I don't understand this about myself, but I have never liked stamping images of birthday cakes??! You'll rarely see one used on my cards and I don't often even buy the stamp sets containing them. In fact, I can't remember if I even bought Party Wishes, or if I got it at OnStage Local back in November.

But I needed an idea for this week's sketch challenge for As You See It Challenges:


I didn't want just a sentiment in the middle; I wanted to add an image as well, so I went looking for a sentiment that would fit in a circle and an image to match. I found the cake and the cake sentiment, which I've always really liked (the sentiment, that is), in the Party Wishes Stamp Set from the Occasions Catalogue.


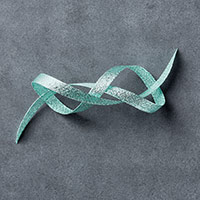
  • The ribbons crossed behind the image threw me! I couldn't get something that looked right. I tried washi tape and other ribbons, including curled Melon Mambo cotton ribbon, until I settled on the Pool Party Glitter Ribbon. But then I had it crossed at too wide an angle and it looked funny.  I was just about to start all over, when I realized that if I reduced the separation between the ribbons, it would look just fine. So I did and here you are!
  • I inked up the cake with a Pool Party Classic Stampin' Pad, avoiding getting any ink on the cake plate. The little that got on the plate I removed with a Qtip, and inked up the cake plate with a Melon Mambo Stampin' Right Marker. The candles are a separate stamp and I used markers to ink them as well.
  • The sentiment is embossed on vellum with Black Stampin' Emboss Powder and punched out with a 1 1/2" Circle Punch. I used Glue Dots behind the largest letters to add it to the card front.
  • Does anyone else think that the Silver and Gold Metallic Thread is from the devil? It looks great on grungy style projects, but it literally has a mind of it's own and refuses to do as you ask it, escaping your attempts to capture and anchor it to your card. Nevertheless, I persisted in this endeavor and eventually won. Now that Silver Metallic Thread behind the image panel (You can see it, right? Tell me you can see it and that it makes a big difference to my card, I beg of you!!) is captured and will remain incarcerated until the end of time as we know it!! Ahahaha!


Tomorrow, I will be at the Craft Fair at Our Lady of Lourdes School, with lots of cards, easel calendars, treats and Easter goodies for sale, along with my retired projects. It goes from 10 - 2 and includes a silent auction with great items donated by all the vendors.


I hope you'll come visit and say hi!


Click on the links below to take you to my On-Line Store, where you can read about, look at, and purchase if you wish, the products used to make this card today.


Product List