
.jpg "Watercolour Background with Pansy Dies for AYSI #279 1")
It's time for my favourite challenge with As You See It Challenges - the colour challenge! My creativity is really driven by colour and this challenge, created by team member Joanne, is a feast for the eyes!
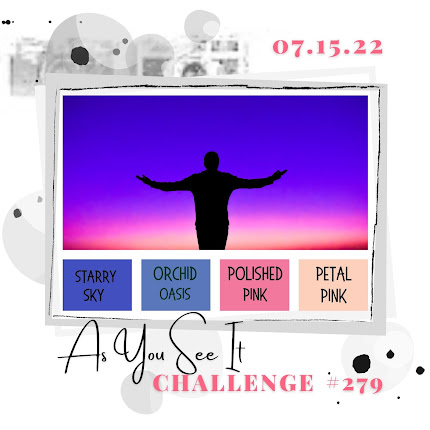
Isn't this gorgeous?!! If there ever was a colour palette that imitated the sunset perfectly, this is it! But did I decide to do a sunset silhouette project? No! I thought about pansies when I saw these colours, and was reminded that it had been ages since I had used my Pansy Patch bundle. I also wanted to do a watercolour background with those colours because they are perfect for that purpose and so my card was pretty much planned out:
.jpg "Watercolour Background with Pansy Dies for AYSI #279 2")
- Using my Stampin' Write markers in Starry Sky, Orchid Oasis, Polished Pink and Petal Pink, I scribbled on a clear block E with the Starry Sky on either end working through Orchid Oasis and Polished Pink to Petal Pink in the middle. I spritzed the block with a little water and stamped it onto a piece of Shimmery White cardstock, smooshing it around a little to blend the colours a bit. I like the way there was a small part that didn't get the benefit of the water and had a different texture altogether. You can see it on the bottom left.
- After drying the panel, I backed it with some Starry Sky cardstock and added it to the Thick Basic White cardstock base.
- I die cut two pansies with the Pansy Dies. One was of Orchid Oasis with Starry Sky and Polished Pink trim and one was of Petal Pink with Orchid Oasis and Starry Sky trim. The centers and leaves of both were made from Basic Black cardstock. I also created a pansy bud from Orchid Oasis, Polished Pink and Black.
- The sentiment from the Pansy Patch stamp set, was stamped in Orchid Oasis ink and die cut using the Stylish Shapes Dies. The lighter coloured pansy and the sentiment were mounted using dimensionals. The other pansy was just glued down. The bud was adhered to the back of the sentiment, but a Mini Dimensional was used to pop it up on the sentiment label.
- The final touch was the addition of several Iridescent Pearls.


When you shop with me during Sale-a-Bration, every $60* you spend earns you another Sale-A-Bration reward, which you can choose from the Sale-A-Bration Brochure.
*on one order before tax and shipping

Want to maximize your rewards? Hand out some catalogues to friends and collect their orders, or host an online or in person party. Earn regular rewards, and for a *qualifying party, as a host you could also win Stampin' Rewards, plus the Perfect Pomegranates Stamp set, seen above.
*to earn the Perfect Pomegranates stamp set, the party or personal orders must total $375 before tax & shipping.

If you want to really make the most of Sale-A-Bration, you could consider purchasing the Starter Kit for $135 and starting your own Stampin' Up! business! During Sale-A-Bration, demonstrators can still earn SAB rewards like customers, but they can also earn additional rewards based on their sales and other parameters! With the Starter Kit comes $165 worth of Stampin' Up! products of YOUR CHOICE, business material AND a bonus, during SAB of the Making Plans Collection of a planner, notebooks and stamp set as seen above!
I hope you participate fully in the last round of Sale-A-Bration this year!!
.jpg "Watercolour Background with Pansy Dies for AYSI #279 3")
If you live in Canada, and don't have a Stampin' Up! demonstrator, I'd love to be yours. I can help you with ideas, get you catalogues and provide you with Stampin' Up products. You can leave a message in the comments or contact me using any of the methods listed in the right side bar at the top of the page. You can shop with me from anywhere in Canada by clicking on the SHOP NOW button in the top menu or clicking on any of products below from my Online Store.
Product List  |  | |||
 |  | |||
 |  |  |  | |
 |  |  |  |  |
 |  |  |


