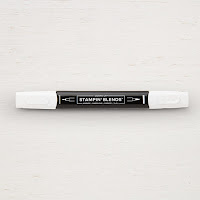
I'm on a bit of a roll lately, playing with the new colours of the Stampin' Blends that I ordered! I've had this Bright Wishes stamp set for a while now, but it hasn't seen much ink, but it's one of the few I've got now that is useful for spending some time colouring with my Blends.
I have a dear friend who has had a run of poor health this year, so I wanted to brighten her day with a pretty hand-stamped card. I had a very therapeutic time colouring it, too, and I wanted to share a tip for using the Colour Lifter Blends tool.
NOTE:
I've been having some trouble with my eyes lately, so by the end of the day, I just can't focus at all, which means that fine work like this is really difficult for me. I end up taking off my glasses, which have Progressive Lenses and should work for this kind of project, and closing one eye and kind of squinting a bit with the other. I wondered if it was because my eyes get kind of dry by the end of the day, but I bought some eye drops to try out and they didn't really help the focusing issue. I guess it's time to see the eye doctor again! Nevertheless, I persevered, and I'm quite pleased with how it turned out.
- My favourite part to colour in, was the well itself. I used the Smoky Slate combo pack (consisting of the Light and Dark shades of Smoky Slate) on the stones and the bucket, but I made the bucket lighter by using the Colour Lifter on it to remove a lot of the colour and lighten it right up. I used the Soft Suede Combo on the wood part and the Crumb Cake Combo on the roof and handle and rope.
- The leaves were the Old Olive Combo for the darker leaves and the Granny Apple Green Combo for the lighter ones and the various flowers were the Flirty Flamingo, Highland Heather, and Pool Party Combo Packs. The background was the lighter shade of Pool Party.
- I stamped the image itself with Memento Tuxedo Black ink on Whisper White cardstock. That's my favourite thing about Stampin' Blends, you don't need to use special paper for it. Whisper White cardstock works just fine. You have to use a water-based ink like the Memento Tuxedo Black so that the alcohol based inks in the Blends won'l dissolve and blur or bleed the image lines.
Colour Lifter User Tip
 I don't know if I'm the only one, but I was getting frustrated, when SU first brought out Stampin' Blends, using the Colour Lifter to fix mistakes, where my colouring had gone outside the lines or into the wrong area. I would use the Lifter and instead of removing the colour where the mistake was, I found that it would just cause more colour to bleed into the area where I didn't want it. I realized that it was because the Colour Lifter was creating an area soaked with alcohol or whatever the solvent is and whatever the colour was in the adjacent area, it would just soak into the wet area. Once I understood what was happening, it was easy to solve the problem. I used the Heat Tool to dry the area quickly before any bleeding could take place. Hallelujah!
So here are my steps for using the Colour Lifter to fix errors:
1. Use the Marker Tip, not the Brush Tip, for accuracy.
2. Push the Marker Tip up to the line from the outside edge of the mistake, rather than starting from the line and colouring out to the end of the error. That gives you more time to dry the solvent before bleeding occurs.
3. Remove some of the colour in the mistake, if it's large, then dry the area with the Heat Tool on the highest setting. (Note: the manufacturer says that the lowest speed is for drying ink, but I've never had an issue with using the highest speed. However, if you want to err on the side of caution, you should use the lower speed. I'm just really impatient and want it to dry before the colour bleeds.)
4. Go back and remove the rest of the colour and dry it again.
5. Do each mistake separately and don't try to take shortcuts by doing a lot at once. You'll just increase the chances of a colour bleed.
Click on the links below to take you to my On-Line Store, where you can read about, look at, and purchase if you wish, the products used to make this card today.


_wm.jpg)

_wm.jpg)
_wm.jpg)
_wm.jpg)


