Showing posts with label Poinsettia Petals stamp set. Show all posts

Friday, December 24, 2021

Merry Christmas

merry christmas 1


 I want to wish all my readers and customers a very Merry Christmas and a Happy New Year. Thank you for all your support in 2021 and here's hoping 2022 is a vast improvement! So far it's not looking good, but let's stay optimistic!


This was a card a made during my Cardathon on Dec. 4. It uses the Poinsettia Petals stamp set and the coordinating Poinsettia Dies. The background paper is the Ever Eden Specialty Designer Series Paper.

Thursday, December 24, 2020

Merry Christmas from Playing with Papercrafting

merry christmas from playing with papercrafting 1

 I've been dying to try out the new *Blending Brushes that I got in my 2021 Jan/Jun Mini Catalogue Preorder. They are amazing for blending inks and I wanted to make a Christmas card to express my wishes for all my readers for Christmas 2020!  

I combined them with the use of products from the retiring 2020 Aug/Dec Mini catalogue, including the Poinsettia Petals stamp set, and some new embellishments, the *Pastel Pearls from the Jan/Jun Mini.

Here's a closer look at the slimline card:

merry christmas from playing with papercrafting 2

  • The Whisper White Thick base measures 8 1/2" x 7" and scored along the 7" side at 3 1/2".
  • The background Designer Paper is the Snowflake Splendour DSP.
  • The Poinsettia image from Poinsettia Petals stamp set as well as a sentiment from it are embossed in white on some Whisper White DSP and then a *Blending Brush is used to blend, from the center outward, Pool Party, Coastal Cabana, Just Jade and Pretty Peacock. I was so excited by the way the Blending Brush picked up the ink and smoothly added it to the cardstock. I still had to start off the page first, but the finish was so smooth, much more so than with either a brayer or a sponge!! And I love how soft they feel!
  • After blending the inks, I used a tissue to wipe off the excess ink from the embossed lines on the cardstock so the designs stand out better. Then I added 3 *pastel pearls to the center of each poinsettia and some self-adhesive snowflakes around and about.
  • A bow was made using the Just Jade 1/4" In Colour Ribbon, and attached with a glue dot.
*These products are from the upcoming 2021 Jan/June Mini Catalogue and will be available to order until Jan. 5, 2021.

merry christmas from playing with papercrafting 3

Merry Christmas to all my Readers and wishes for a wonderful new year in 2021!


merry christmas from playing with papercrafting 4

If you live in Canada, and don't have a Stampin' Up! demonstrator, I'd love to be yours. I can help you with ideas, get you catalogues and provide you with Stampin' Up products. You can leave a message in the comments or contact me using any of the methods listed in the right side bar at the top of the page. You can shop with me from anywhere in Canada by clicking on the SHOP NOW button in the top menu or clicking on any of products below from my Online Store.


Product List

*Pastel Pearls, *Blending Brushes
*These products are from the upcoming 2021 Jan/June Mini Catalogue and will be available to order until Jan. 5, 2021.

Monday, September 21, 2020

Poinsettia Dies in Brayered Vellum


I've seen so many beautiful Christmas cards recently using the Poinsettia Dies that I just had to have another go at them. This time, I decided to use vellum and I wanted to add some colour to it, so I decided to get out my sponge brayers and add some Magenta Madness and Just Jade ink to one side of two different pieces of vellum. These are two of my favourite new In Colours this year and they did a great job with their vibrant tones. A pastel tone would be too washed out to add colour to vellum, because the vellum tones it down so much.

Let's take a closer look first, before I describe the process in more detail:


  • First I added colour to one side of two pieces of vellum using sponge brayers, one for the Magenta Madness and one for the Just Jade ink.
  • Once the vellum was covered evenly in the ink, I dried it using the Heat Tool, and then set it aside a bit to let it dry even more, otherwise it comes off on your fingers and makes a mess.
  • I stamped the sentiment from the Poinsettia Petals stamp set in Magenta Madness on the top of the Whisper White panel and added it to the Just Jade card base.
  • I die cut, using the Poinsettia Dies, 1 large poinsettia flower with embossing plate, and 2 each of everything else: the medium poinsettia flower with embossing plate, the small embossing flower with embossing plate, small leaf with embossing plate, the large leaf with embossing plate and the berry sprig.
  • I die cut 4 of the teeny flowers. I heat embossed the berries twice using Silver Stampin' Emboss Powder on the Just Jade brayered vellum, then die cut them using the berry die cut.
  • I assembled everything using Liquid Multipurpose Glue, because Glue Dots won't work on the brayered surface of the vellum, unfortunately. I gently used the bone folder to shape the petals and leaves first. I then glued everything to the card front as shown using the Liquid Multipurpose Glue again.
  • I used either the Beaded Pearls embellishments or regular pearl jewels to add centers to the poinsettias.

If you live in Canada, and don't have a Stampin' Up! demonstrator, I'd love to be yours. I can help you with ideas, get you catalogues and provide you with Stampin' Up products. You can leave a message in the comments or contact me using any of the methods listed in the right side bar at the top of the page. You can shop with me from anywhere in Canada by clicking on the SHOP NOW button in the top menu or clicking on any of products below from my Online Store.

Product List

Friday, September 4, 2020

Poinsettia Dies are Amazing!

poinsettia dies are amazing

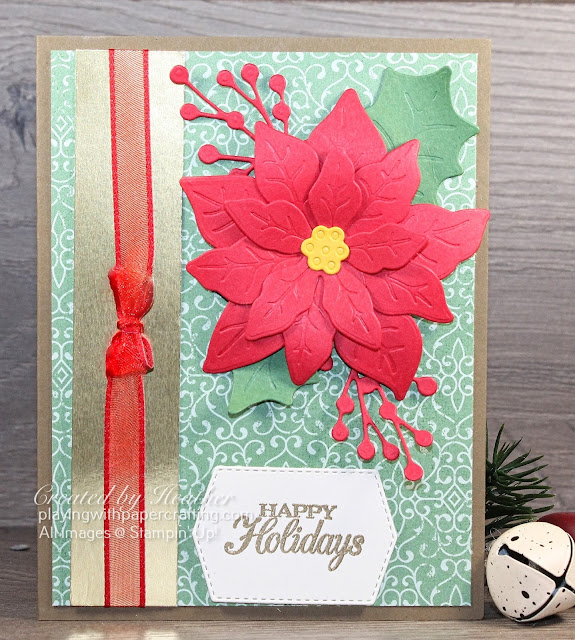
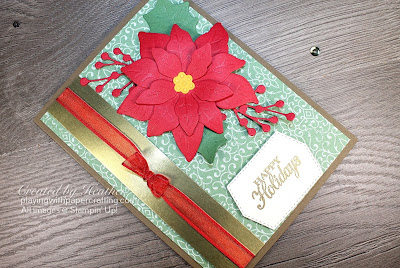
The Poinsettia Dies that bundle with the Poinsettia Petals stamp set are a whole amazing story all on their own. They can die cut three levels of a flower to put together for sure, but they also have an inset for the dies that embosses the veins on the petals and gives them that extra realistic texture. The same goes with the leaves, and centre. It's a set that is really worthwhile having. If you don't want to emboss them, you can stamp the petals and leaves with the Poinsettia Petals stamp set and then just die cut the outlines. That's what I did here

The other thing I noticed when I was die cutting pieces of this card for my Catalogue Launch make & takes on Saturday was that the leaves would make great holly leaves, too. I can feel a wreath taking shape!

Take a close-up look:


poinsettia dies are amazing

  • Now you can really see that embossed texture in the leaves and petals!
  • The berry sprigs are also a die cut from the Poinsettia Dies.
  • The sentiment is from Poinsettia Petals stamp set and is embossed with Gold Stampin' Emboss Powder on a tag die cut using Tasteful Labels dies.
  • The background Designer Paper is from the Poinsettia Place Designer Series Paper. I also added a strip of Gold Foil Sheet to the card front and some Real Red 3/8" Sheer Ribbon tied in a little Fork Bow and wrapped around the foil. I love the whole vintage look of this card.
  • It's easy to curl the petals of the flower with your bone folder and attach the layers together using Glue Dots.
september paper pumpkin

You have until Sept. 10 to subscribe to Paper Pumpkin in order to get this cozy looking kit for September! I don't know about you, but the fall kits are my absolute favourites with their warm colours and fun images! Don't miss out on this one! You can subscribe HERE, keeping in mind that it is very easy to manage your subscription, putting it on hold when you need to or unsubscribing when necessary. But I don't believe you'll want to when you start looking forward to that all inclusive creative escape delivered right to your door, once a month!

poinsettia dies are amazing

Eight years ago, I made a decision that has been one of the best I've ever made in my life. It has brought me a life of creativity, friendships from all over the world, recognition and accomplishment and I'm so glad I've had the chance to experience that through a company like Stampin' Up! Now I have my own team and I would love to have you join me so I can help you experience the same opportunities and friendships! And during September, you not only get the usual great deal with the Stampin' Up! starter kit ($135 gets you $165 of any current Stampin' Up! Products of your choice with no shipping costs) but you will also get two extra stamp sets and enough precut cardstock kits to make 16 cards - a little headstart to hold your first event with any help you need from me, should you want to get a leg up on running your business, or you can just use them for yourself! But it never hurts to have a customer or two to help support your hobby!  Join my team HERE or email me for more information.

poinsettia dies are amazing

If you live in Canada, and don't have a Stampin' Up! demonstrator, I'd love to be yours. I can help you with ideas, get you catalogues and provide you with Stampin' Up products. You can leave a message in the comments or contact me using any of the methods listed in the right side bar at the top of the page. You can shop with me from anywhere in Canada by clicking on the SHOP NOW button in the top menu or clicking on any of products below from my Online Store.

Product List