Monday, March 27, 2023

Birthday Booklet for My Hubby

birthday booklet 1

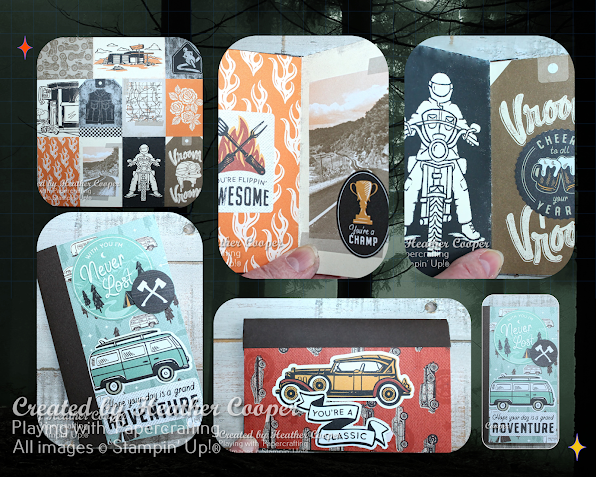
 This is an update from my post on Friday, which was my hubby's birthday! I had to make a project for my Design Team sample for As You See It Challenges and this week's challenge happened to be a Speed Challenge, which meant I had to finish in 10 minutes or less.

I had decided to use the characteristics of this Ready to Ride Specialty Designer Series Paper to make a folded booklet and it didn't leave me much time to embellish it as much as I wanted to for my sweetheart.

dsp

Here's the way a folded booklet is made:


In my rush to complete my project in 10 min. I don't think I completed the fold correctly because I was missing two pages, but that ended up being a good thing because I would never have been able to decorate them in time.

Here are the completed pages with the pre-made die cuts that come with the He's the Man Specialty Designer Series Paper. I also decided to close the booklet using the Early Espresso Faux Suede Ribbon tied in a square knot on the front. It slips off easily.
birthday booklet 2

Front cover with some He's the Man DSP glued on and the Early Espresso cardstock on the spine.


birthday booklet 3
This is the 2nd & 3rd page! So cool how the flames of Ready to Ride work with the BBQ die cuts from He's the Man. Also the road page has some die cuts that work with it as well.

birthday booklet 4

The adhesive-backed studs from the Ready to Ride suite decorate the tire and leathers on this page.


birthday booklet 5
I added a panel from the die cuts to write my greeting on it!

birthday booklet 6

The back cover is also covered with He's the Man DSP and has a vintage car theme!
colour refresh

It's official. There will be a complete Colour Refresh of all the colour families in the new 2023/24 Annual Catalogue in May! Who knows what colours will stay and what colours will go? None of us! Not until Mar. 29th at least. And then the retiring colours will vanish within days as everyone hoards their favourites! If you have a favourite, better make sure you get some cardstock and a refill and maybe some Stampin' Blends before all heck breaks loose! Some of the colour family combos are already out of stock!! Just warning you! And don't forget the 2021-2023 In Colours are also retiring!...Maybe!

birthday booklet 7

If you live in Canada, and don't have a Stampin' Up! demonstrator,  I'd love to be yours. I can help you with ideas, get you catalogues and provide you with Stampin' Up products. You can leave a message in the comments or contact me using any of the methods listed in the right side bar at the top of the page. You can shop with me from anywhere in Canada by clicking on the SHOP NOW button in the top menu or clicking on any of products below from my Online Store.

Product List

Friday, March 24, 2023

Ready to Ride Meets He's the Man for As You See It Challenge #295


ready to ride meets he's the man for aysi #295 1

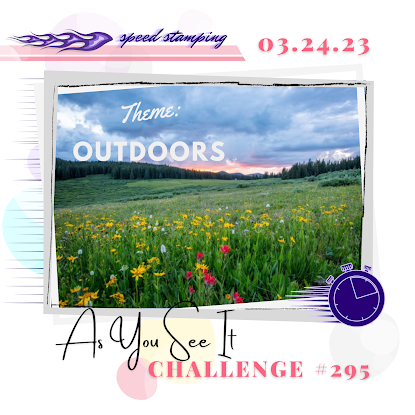
Welcome to "What Not to Do for a Speed Stamping Challenge!" Our Speed Challenge has rolled around once again and this time, our team mate Jane came up with a great generic theme of the Outdoors! That gives everyone huge scope of possibilities. Just keep in mind that a speed stamping project must be completed in 10 minutes or less!!
aysi challenge #295
The other thing you need to know is that my hubby's birthday is coming up next week and I wanted to make him a birthday card. I was going to do two separate cards, but then I thought, why not combine the projects. I can always add more to the ten minute card after I've photographed it for the Speed Stamping Challenge.
So I dug into my masculine suites and decided that He's the Man and Ready to Ride should work together nicely...then I saw this piece of specialty DSP and that was the beginning of my downfall!

ready to ride specialty dsp

As soon as I saw those 8 separate panels on the bottom part, the cogs started turning and I envisioned one of those booklets you can make by folding paper into 4 double pieces and then cutting down the middle fold. I knew it was a risky thing to do for a speed challenge but I couldn't let it go, especially when I had a lot of glue on pre-made die cuts that go with the He's the Man suite to finish off the pages quickly!
The panels were not the same length but it turned out that two of the shorter panels formed the front and back cover so I just covered them with He's the Man DSP and the middle two shorter panels were hidden inside the booklet and didn't show.
The following photos will show you how it turned out. It took the whole 10 minutes, in fact I just stopped adding things when the timer went off. I should say that before I added any die cuts, I also added a binding of Early Espresso Cardstock on the spine to make that look tidier. That took up a couple of minutes itself.


ready to ride meets he's the man for aysi #295 2
The front and back cover have He's the Man Designer Series Paper glued on to cover the shorter panels from the other half of Ready to Ride DSP. They measure 5" x 3 1/8". The Early Espresso cardstock used for the binding measures 1 1/2" x 5" scored at 3/4" on the short side.
ready to ride meets he's the man for aysi #295 3

ready to ride meets he's the man for aysi #295 4
ready to ride meets he's the man for aysi #295 5
 
In my next post, I'll show you the extras I added for my hubby's birthday card, basically just more embellishments and pre-made die cuts.

april paper pumpkin

This April Paper Pumpkin kit looks beautiful, and it comes with a free box organizer! To subscribe before Apr. 10, click HERE. By the way, it is very easy to pause or stop your subscription. You are never stuck in it!

paper pumpkin

ready to ride meets he's the man for aysi #295 6


If you live in Canada, and don't have a Stampin' Up! demonstrator,  I'd love to be yours. I can help you with ideas, get you catalogues and provide you with Stampin' Up products. You can leave a message in the comments or contact me using any of the methods listed in the right side bar at the top of the page. You can shop with me from anywhere in Canada by clicking on the SHOP NOW button in the top menu or clicking on any of products below from my Online Store.

Product List

Wednesday, March 15, 2023

Spelling Bee for New at SU

new at su blog hop

Welcome to our March NEW AT SU! Blog Hop! We love to share creative card ideas from Stampin' Up! with you. Today we have projects featuring alphabet sets and other current stamp sets to Spell It Out! I am using the beautiful Queen Bee bundle and the new Classic Letters set from the Online Exclusives offerings.

spelling bee for new at su 1


I had fun with this card! It was the first time I had a chance to use the Naturally Gilded Specialty Designer Series Paper and I used it here in the background. I think it works very well with the Queen Bee Bundle. The Classic Letters Stamp set has quite a large font, so unless you were using a slimline format there's no room for a large sentiment to be spelled out here.  Here's each card in detail:

spelling bee for new at su 2

  • I originally started with a Basic Black card base and frame, but it looked just too stark with the Naturally Gilded DSP, so I switched to Early Espresso for both. I added a panel of 4" x 5 1/4" Naturally Gilded Specialty DSP but not before adding the bow and ribbon with Gold 1/4" Shimmer ribbon at the bottom.
  • Using the Framed Florets Dies, I die cut the frame out of Early Espresso and again out of So Saffron, using only the center.
  • After stamping some of the splatters from the splatter image in Early Espresso ink on the So Saffron center oval, I ran it through using the Hive 3D embossing folder and glued both to the card front.
  • I stamped the large bee, small bee, crown and distressed type images in Early Espresso on Very Vanilla cardstock and die cut them all. The distressed type I die cut using the single small rectangle in the Stitched Rectangle dies. I added them all to the card front as you see, using dimensionals for the bees and crown.
  • I also die cut some of the little honeycomb flowers from Crushed Curry. I removed some of the edges from a couple and glued them on.
  • I embossed the sentiment HI! using the Classic Letters set in Gold on Very Vanilla, and die cut it with one of the Tailor-Made Tags dies. I altered it by making it shorter, die cutting it a second time. I used the Elegant Gold Trim to tie it to the bow, but also used dimensionals to hold the tag where I wanted it.
  • It was embellished with the Brushed Metallic Dots in gold.
spelling bee for new at su 3

My middle daughter is a beekeeper so I know she will love this set!

I hope you enjoyed this project made with the Queen Bee bundle and the Classic Letters stamp set. The first product can be found in the 2023 Jan/Apr Mini Catalogue and the second in the Online Exclusive offerings on the Stampin' Up! website. The Naturally Gilded Specialty DSP is also found in the Online Exclusives.
Please take a moment to comment at the bottom of this post and let me know how you liked my project or ask me a question about the technique used. Don’t forget to scroll back up and keep hoppin’ with us! – Thank you!
Keep Creating!
Heather Cooper

Please contact your Stampin’ Up! demonstrator if you have any questions or to make a product purchase. If you do not have a demonstrator, I would be happy to answer any questions about products, or the techniques shown here. 

Here's the list of bloggers in our New At SU March Blog Hop to help you keep on track:


Product List