Monday, October 31, 2016

A Final Tip of the Hat to Halloween for Freshly Made Sketches


Can I confess one last time that I secretly love to make Halloween cards, even though Halloween is my least favourite holiday? I think it's because of the rich colours, the great textures and the stark images. Since today is Halloween, I decided to do one last Halloween card and dedicate it to all my little grandkids who are dressing up to go trick or treating today.

I used the Freshly Made Sketches challenge for my layout:


I used the Jar of Haunts one last time and the Halloween Scenes Edgelits dies. I went all out with Halloween colours: Elegant Eggplant, Tangerine Tango, Old Olive and Basic Black, with a shot of Daffodil Delight for the moooon!


  • I love that tree from the Halloween Scene Edgelits. It looks so perfect, silhouetted against the moon! And there are some great accessories in that die set as well, like the bats.
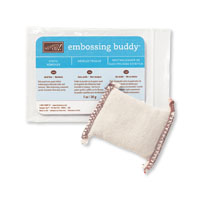
  • The Jar of Haunts stamp set has that great pumpkin which looks wonderful on its own, or you can make it into a happy jack-o-lantern, or really go spooky with the mean eyes and the gooey drips. It's hard to see in the top photo, but I used the drippy stamp again at the bottom of the black card stock with the tree at the top. I embossed them with some retired Black Stampin' Emboss Powder and then fussy cut them to give the bottom of the black strip some more interest. You can see it better in the photo below:


I have to say that my daughters have gone all out in the costume department. One of my grandsons wanted to be a praying mantis - his latest interest and passion. Can you image? Well, my daughter down loaded a complicated pattern to make it from cardboard and this is the result:


Can you imagine the work that went into this? I hope tomorrow is dry!


Two of my other grandkids have somewhat quirky wishes for their Halloween costumes as well. One wants to be a Princess Firefighter:


while the other wants to be an.....Aspen Tree Octopus! Bet you haven't heard that one before! Mom knitted him an Aspen Tree sweater last year. So she just had to knit some octopus tentacles this year to add to it.


You'll probably never see anything like this in your lifetime again, so take a good look!


What are the little ones in your family dressing up as? Do you even participate in Halloween celebrations?


Click on the links below to take you to my On-Line Store, where you can read about, look at, and purchase if you wish, the products used to make this card today.


Product List
Black Stampin' Emboss Powder
[109133]

Friday, October 28, 2016

Learn to Make an Illuminated Easel Shaker Card!


Can you believe that this is the last weekend in October? And Halloween is on Monday? Where does the time go? I'm feeling anxious about starting my Christmas shopping! The big thing on my mind right now, though, is finishing my November newsletter and getting it out there this weekend. Especially because I have a really busy weekend coming up. Last Saturday, our Refugee Care Collective got together to make apple pies as a fundraiser. We made 105 pies before noon, but still had a lot of apples left, so we're doing the same thing this Saturday! They're $10 each and really yummy for those of you who live nearby and want in on it.

                               Image result for apple pie

                                  The pies are frozen with baking instructions on the label.

On Sunday, I'm rehearsing a Christmas play with the Sunday School kids that we will be presenting on December 11th. There isn't much time to get it together when we can only rehearse on Sundays, so that's a bit scary! And I'm helping with an Alpha course Sunday night!

So with all that going on, it's not leaving a lot of time left over for the newsletter! I do have the Free Photo Tutorial planned however. As you know, if you subscribe to my newsletter, each month I offer a free photo tutorial with step-by-step instructions for making a papercrafting project, and this month, I will be showing you how to create this beautiful Illuminated Easel card that is also a shaker card.


Although the card folds flat for mailing, you can prop it up as shown and put a little battery powered votive candle in behind the front and it will shine through the window with the wreath on it. You can just see some trees in the distance behind the sequin snow that "falls" when you tip the card. The window makes use of the antique-looking Fabulous Foil Designer Acetate which is sturdier and easier to use than Window sheets. The walls and carpet are from the Presents & Pinecones Designer Series Paper, while the window is created with the Hearth and Home Framelits.


The free Photo Tutorial includes a list of supplies and measurements as well, including how to order them if needed.

If you're not a subscriber to my newsletter, but would like to get this free tutorial, it's easy to subscribe today by entering your email address to the link below and clicking GO. You may unsubscribe at any time without difficulty.


Join My Mailing List
Email:


For Email Marketing you can trust


Wednesday, October 26, 2016

Exciting News from Stampin' Up! for November


I'm so excited to announce a new promotion and a new product from Stampin' Up! starting November 1 until November 30!  I've been wanting these forever and they couldn't come at a better time, just in time for holiday giving and getting (rubbing hands together gleefully!) Get ready to add these to your Christmas Wish List, or better yet, buy yourself a Christmas present, because girl, you deserve it!

New Stitched Shapes Framelits will be available starting November 1 until November 30. They are a sneak peek from the 2017/2018 Annual Catalogue! But what's even better is that a select number of coordinating stamp sets will be 25% off during this period.


Here are more details:


And don't forget that there is just 1 WEEK LEFT on our current promotion: Designer Series Paper: Buy 3 packages and get 1 package Free.


Monday, October 24, 2016

Tin of Tags Snowflake in Silver


Have I mentioned that I like non-traditional colours for Christmas cards? The colours for this card, using the Tin of Tags stamp set, started out as an, "I wonder what..... would look like?" and turned out to be amazing together! So mark this down:
                 Rose Red,                        Smoky Slate,                 Whisper White and             Silver!

Here's a closer look at that amazing snowflake stamp from the Tin of Tags stamp set:

  • When you see it on the stamp case, the snowflake stamp looks much smaller and less impressive, but when you take it out of the case, you get a different story altogether! It's big and beautiful! And when you emboss it with Silver Stampin' Emboss Powder, it has WOW!! factor! It's a good idea to stamp your sentiment, also from Tin of Tags stamp set, first, in Rose Red ink, so that you can distribute your snowflakes evenly around it and still have room for it. You definitely want some of them stamped off your paper to give a sense of continuity. 
  • I added a small rhinestone to the center of each snowflake for some added bling. And the Silver 1/8" Ribbon ties neatly into a small bow that helps to bring balance to your design where it's needed. I added a Rose Red Enamel Shape to the bow for a finishing touch.
  • This is a relatively simple card to make for mass production for your Christmas cards this year, and not too expensive.

Click on the links below to take you to my On-Line Store, where you can read about, look at, and purchase if you wish, the products used to make this card today.


Product List