Wednesday, June 30, 2021

Grandsons' Birthday Cards - Punch Art

wyatt 1

kesten 1

 We had two birthdays in the family last week, two of my grandsons, a day apart from each other. I used punch art to make their cards. Just thought I'd give you a quick peek at them.

Kesten's birthday was first and he's a Minecraft expert, so I created an underwater minecraft scene with the characters Steve and Alex.

kesten 2

I needed to make a slimline card for this scene I think, in order to fit everything in, but at least I got the main characters and the underwater cave scenery in. If you don't know about Minecraft, everything is digital so all the illustrations and graphics are based on pixels. They come out square or triangular or rectangular. I wanted the scene to be more epic but I would have had to make everything much smaller and wouldn't have been able to include the details. I used the Layering Diorama Dies for the cave, but used a square punch on some of the edges to square them off Minecraft style, and the Hammered Metal 3D Embossing folder to add some texture to the outside rock one. Alex's Minecraft sword I printed off and added because I wasn't going to attempt that!

Here's the birthday boy, who turned 9! I can't believe he's already that old!


kesten 3


The next day was my grandson Wyatt's birthday, and ever since my daughter read him the story, The Hockey Sweater, he's been obsessed with Henri "Rocket" Richard of the old Montreal Canadians Hockey team. #9! So this was the card I made him:

wyatt 2

I used lots of retired punches for this one, especially the Word Window punch and the Medium Oval punch, and the Bow Builder punch came in handy for the stripes. I printed the Habs symbol and the captain's C and fussy cut them to add to the  image as I wasn't going to attempt those either. I used Stampin' Write markers for the face and White Gel pen for the skate laces and the tunic laces.

The sentiment was made using the Playful Alphabet dies.

Here's the birthday boy, Wyatt, who just turned 8:

wyatt 3


I'm so proud of all my grandkids and I'm so excited to see ALL of them this summer! Making special cards for them is a joy.


wyatt 4

kesten 4


If you live in Canada, and don't have a Stampin' Up! demonstrator, I'd love to be yours. I can help you with ideas, get you catalogues and provide you with Stampin' Up products. You can leave a message in the comments or contact me using any of the methods listed in the right side bar at the top of the page. You can shop with me from anywhere in Canada by clicking on the SHOP NOW button in the top menu or from my Online Store.

Monday, June 28, 2021

Vintage Grapevine for Monday Morning Facebook Live

vintage grapevine for monday morning live 1

 Welcome back after the weekend! We're suffering through an intense heatwave here with highs in the 40s which is like 104 plus in Fahrenheit. We're lucky enough to have central air conditioning, but I really feel worried for those who don't. Thankfully, they are setting up cooling centers for people who don't have options.

Today is my regular Monday Morning Facebook Live and I wanted to do a simpler version of a vintage card that I did a couple of weeks ago so I could demonstrate it. I will post the You Tube video replay here after I upload it. (I apologize for the sound quality. Something went wrong with the editing program I use.)


Here is the more complicated version:

original vintage card 1

You can find it here.

My speedier, simplified version is this one, using the Forever Grapevine Bundle from page 76 in the 2021/22 Annual Catalogue.

vintage grapevine for monday morning live 2

  • Again I used an 8 1/2" x 5 1/2" piece of Soft Sea Foam cardstock for my base. Soft Sea Foam is an awesome colour to use for vintage card making, especially paired with Very Vanilla and wood tones. The card base is scored along the 8 1/2" side at 4 1/4".
  • On another sheet of Soft Sea Foam cut at 4" x 5 1/4", I stamped some splatters from the Quiet Meadow stamp set in stamped off Crumb Cake ink.
  • Then this panel is embossed in the Painted Texture 3D Embossing Folder as a faster way of adding Embossing Paste texture. I then used a Blending Brush to lightly add Crumb Cake ink to areas on the top of this panel, after adding a strip of the Very Vanilla Scalloped Lace Trim down the left side of this panel about 3/4" from the left side.
  • I made a raised "wooden panel" by cutting a piece of the heavy chipboard that comes with our foil sheets to 2 3/4" x 4 1/2" and then a piece of the dark wood grain from the In Good Taste DSP to the same measurements and gluing the two together, matching the edges exactly. This panel is glued to the card front as shown.
vintage grapevine for monday morning live 3


  • I die cut the grapevine, extra leaves and a couple of the flourishes from the an extra piece of Soft Seafoam, measuring 5 3/4" x 4 1/4". The dies are from the Grapevine Dies. I glued on the grapevine and flourishes to the woodgrain panel and then added the extra grape leaves with Mini Stampin' Dimensionals.
  • The sentiment is from the Forever Grapevine stamp set as is the shape around it and it is die cut with a coordinating die from the Grapevine Dies. I stamped it in Early Espresso ink on Very Vanilla cardstock and stamped the shape around it in Crumb Cake ink. I added Crumb Cake ink to the edges using a Blending Brush.
  • Dimensionals were used to add the sentiment to the card front as shown.
  • For a couple more days you can get the Ladybug trinkets from the Jan/June Mini Catalogue, then they will be gone. I added one to this card front.
  • The Bumblebee trinkets are back in stock and adding two to the card really adds to the look.
hey chick 1

Hey Chick and Hey Birthday Chick Bundles Retire June 30, 2021!!

Only 3 more days to order!!

hey chick 2


vintage grapevine for monday morning live 4

If you live in Canada, and don't have a Stampin' Up! demonstrator, I'd love to be yours. I can help you with ideas, get you catalogues and provide you with Stampin' Up products. You can leave a message in the comments or contact me using any of the methods listed in the right side bar at the top of the page. You can shop with me from anywhere in Canada by clicking on the SHOP NOW button in the top menu or clicking on any of products below from my Online Store.

Product List
Chick Dies
[158199]
$44.00

Friday, June 25, 2021

Artistic Dies for As You See It Challenge #253

artistic dies for as you see it challenge #253 1


Is it just me, or does the time between our As You See It Speed Challenges get shorter and shorter? It just seems to speed by! 🤦🤦 This week is Challenge #253 - Fast Foliage. Here is the challenge banner: 


aysi challenge 253

Speed Challenges are where you have 10 minutes only to make your card. You can design it in your head and gather materials, but the moment you begin to cut or stamp or die cut you have to start the timer and when 10 minutes are up, you are done, whether or not you feel finished. These used to really intimidate me. Now I know what kind of card to design so that I can finish in time, but in spite of that, stupid things keep happening to slow me down.

For instance, when I went to cut the card base for this card, there was something at the end of my paper trimmer that kept me from making a clean cut at the end, and it took me three tries to remove it! Ask me if that has ever happened before!

When I went to die cut the foliage, I wanted to remove the die cut to my die brush box to roll out all the bits, but the Stampin' Cut & Emboss Machine had done such a good job that all the little bits came out on my cutting plate before I could get it over there. So I had to clean all those pesky pieces off my eroded cutting plate (I have a new one coming shortly) before I could do my second die cut! I could only happen to me all at the same time! Even with those silly set backs, though, I was finished in 7 minutes and 26 seconds giving me 2 1/2 minutes to spare.

artistic dies for as you see it challenge #253 2

  • I started with a Granny Apple Green card base and added a piece of Expressions in Ink Specialty Designer Series Paper. This series should be available again next week. Let me know if you want some.
  • I die cut the foliage die from the Artistic Dies in Just Jade and Gold Foil Sheets and added them to the card front with glue dots.
  • I used a printed sentiment from the last Paper Pumpkin kit - Expressions in Colour - which coordinates with the Expressions in Ink Suite, and adhered it using a vellum tape runner.
  • I added some self-adhesive iridescent sequins from the same Paper Pumpkin kit and I was done! Stop the clock!!
paper pumpkin 1

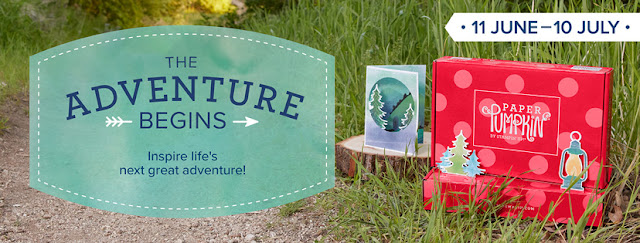
You have until July 10 to subscribe to the next Paper Pumpkin kit which has an outdoorsy camping theme! Perfect for the kind of holiday many Canadians have embraced during COVID, and will hopefully enjoy with their families for many years ahead!

paper pumpkin 2

artistic dies for as you see it challenge #253 3

If you live in Canada, and don't have a Stampin' Up! demonstrator, I'd love to be yours. I can help you with ideas, get you catalogues and provide you with Stampin' Up products. You can leave a message in the comments or contact me using any of the methods listed in the right side bar at the top of the page. You can shop with me from anywhere in Canada by clicking on the SHOP NOW button in the top menu or clicking on any of products below from my Online Store.