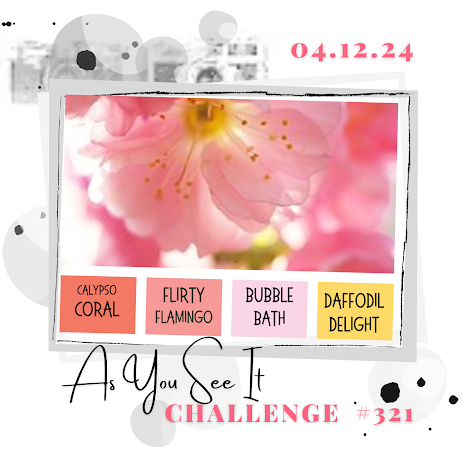
It's my favourite challenge time at As You See It Challenges. This week we are doing a colour challenge, and not only is it my favourite kind of challenge, but I was the one who came up with it. So if you don't like it, I'm the one you curse! But the photo on the challenge banner was so pretty, I knew right away that it would be the photo for the challenge.
Those delicate cherry blossoms dictated a fragile monochromatic pink palette with a little touch of yellow! I immediately thought of the Irresistible Blooms bundle from the Online Exclusives. I went right away to check that you could still order them and, though they are in low inventory, they can still be ordered! The flower stamps just reminded me of these blossoms as large as they are. Here's the result:
- I started with a card base of Bubble Gum cardstock cut at 5 1/2" x 8 1/2" and scored at 4 1/4".
- I added a piece of the Hello, Irresistible 6x6 DSP to the card front. It was cut at 5 1/4" x 4".
- I die cut some Basic White cardstock using the second largest Deckled Rectangle dies and embossed it using one of the Basic Embossing Folders. Before embossing it, I stamped two areas with the splatter stamp from the Irresistible Blooms stamp set, in Calypso Coral.
- I cut out a backing of Flirty Flamingo cardstock measuring 3 1/2" x 4 3/4".
- For the flowers, I embossed two of the large blossoms and two of the small blossoms from the stamp set in white embossing powder and then coloured them in using Stampin' Blends in Flirty Flamingo, Bubble Bath and Daffodil Delight. I die cut each one and used the bone folder to fold some dimension into the petals.
- I die cut one of the horizontal embellishments in white as well, cut it in half, and trimmed off pieces to make it look like sprigs to put behind the blossoms.
- To assemble, I used glue dots to attach the sprigs, and glue dots and dimensionals to attach the blossoms to the card front.
- I tied a bow using the Bubble Bath from the 3/8" Sheer Ribbon Combo pack and added it among the blossoms using a glue dot.
- Using the smallest Deckled Rectangle die, I cut two, one from Flirty Flamingo and one from Calypso Coral. I embossed the sentiment on both using White Embossing Powder. I wanted to see which one looked best in front. I settled on Flirty Flamingo and put the Calypso Coral behind as a matte. They were mounted on dimensionals.
- Finally, I added some pink rhinestones I had in my stash.
It's ON!! Big Savings for many items, not to mention getting the basics at lower prices than you'll find in the new catalogue! Stock up NOW! Don't say I didn't warn you! Click HERE to see the savings in my Online Store.
If you live in Canada, and don't have a Stampin' Up! demonstrator, I'd love to be yours. I can help you with ideas, get you catalogues and provide you with Stampin' Up products. You can leave a message in the comments or contact me using any of the methods listed in the right side bar at the top of the page. You can shop with me from anywhere in Canada by clicking on the SHOP NOW button in the top menu or clicking on any of products below from my Online Store.
Product List

.jpg)

.jpg)

.jpg)


Those florals are so beautiful Heather and clearly inspired by your choice of inspo photo! I actually thought you'd watercoloured them, so bravo to achieve this look using your Stampin' Blends - the finished result is so dreamy!
ReplyDeleteThanks, Joanne! You always say the nicest things!
DeleteThis is just so soft and pretty! I love the 3D nature of the blooms as you've curved some of them up. I can see the photo inspiration clearly in this. :-)
ReplyDeleteThese blossoms are so lovely, the 3D effect you did with them is perfection! Thanks so much for visiting my blog, I appreciate your time and sweet comments. Hugs!
ReplyDelete