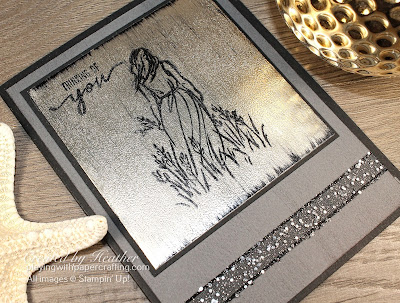
I have a few techniques I want to share with you over the course of the next few Monday Morning Lives on my Facebook page, Playing with Papercrafting, and the first one is the Black Ice Technique. First developed by Melissa Kerman, this technique uses foil, black ink, Versamark ink and clear embossing powder to create a unique look that always reminds me of rain.
I thought that Beautiful Moments stamp set would look great with this technique, so I chose this image and this sentiment and got started! This will be my Facebook Monday Morning Live video this morning at 11 am PDT so tune in to my Playing with Papercrafting Facebook page to watch! Or pop back here, as I will upload it to YouTube and post it back on this page after I'm done.
I'll also have all the materials and measurements listed here for you, as well.
- I started with a Basic Black card base cut at 5 1/2" x 8 1/2" and scored at 4 1/4" along the 8 1/2" side.
- I took a piece of Basic Gray cardstock measuring 5 1/4" x 4" and I dragged the StazOn ink pad down the cardstock on both sides with just the top edge touching the paper and keeping it straight. I used a scrap piece of copy paper to protect the cardstock from contacting the other edge of the ink pad. (You'll see this in the video)
- The backing for the black ice panel is a piece of Basic Black cut at 3 5/8" square. I adhered it to the Basic Gray panel about 1/4" from the top and each side.
- I added a 6" piece of 3/8" Black Glittered Organdy Ribbon across the bottom of the Basic Gray piece about 1/2" from the bottom.
- For the technique itself, I used a 3 1/2" square piece of Sahara Sand foil from the Love You Always Foil sheets.
- I swiped the StazOn ink pad across it both up and down, the same way I did the Basic Gray background sheet.
- Stamped the image from Beautiful Moments on the foil in StazOn Ink. I tried another more solid image from another stamp set before this and I couldn't get it to completely fill in no matter how many times I stamped it, so went for this line image instead. Stamped the sentiment as well.
- Dried the ink completely using the first setting on the Heat Tool.
- Lightly dragged the Versamark Ink pad down each side, using the scrap paper to protect the middle from the other edge of the pad.
- Covered the foil with Clear Embossing Powder and heat set it to get that beautiful ice effect.
- Adhered it to it's background on the card front with Stampin' Seal+ to keep it flat.
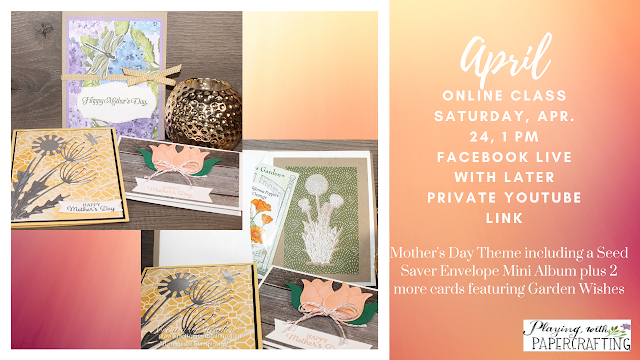
My April card class is up on the Online Classes tab in my top menu. You can get all the details on the page, but we are making 3 projects, a card, a notecard, and the big project of the night - a Seed Saver Mini Album. The theme is Mother's Day, but projects would work for anyone if you changed the sentiment. The date and time is Saturday, Apr. 24th at 1 pm on Facebook Live, but if you can't make that or don't finish the projects, I will upload the video to YouTube and give you the link.
To Register by Fri. Apr. 9 fill out this form: https://forms.gle/M5TD1sTy5pD7RQqM6
I will be getting my copies of the new 2021/22 Annual Catalogue soon and start getting them out to customers. If you would like one, please let me know and I'll pop one in the mail to you!
If you live in Canada, and don't have a Stampin' Up! demonstrator, I'd love to be yours. I can help you with ideas, get you catalogues and provide you with Stampin' Up products. You can leave a message in the comments or contact me using any of the methods listed in the right side bar at the top of the page. You can shop with me from anywhere in Canada by clicking on the SHOP NOW button in the top menu or clicking on any of products below from my Online Store.


No comments :
Post a Comment
I love to read your comments and get to know you better! Thanks for adding one!