Showing posts with label New at SU. Show all posts

Wednesday, April 16, 2025

Botanical Textures Suite of Memory for New at SU

© new at su banner

Welcome to our April NEW AT SU! Blog Hop! We love to share creative ideas from ®Stampin' Up!© with you. Today we have projects featuring Memory Keeping ideas with current products. I'm featuring the Botanical Textures Suite. I love the texture that the suite brings, which creates interest in the layout of your scrapbook page in so many ways. Below you can see the full layout:

botanical textures suite of memory for new at su 1


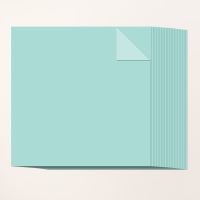
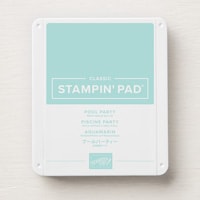
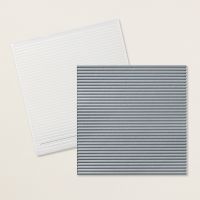
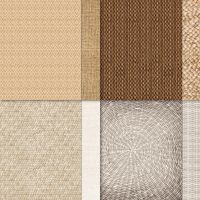
My base is a 12" x 12" sheet of Pool Party Two Tone cardstock. It's a new product that Stampin' Up! has brought out specifically for scrapbooking, although it has many other applications. The strip of DSP that I applied to the base is from the suite and it's called Woven  Textures. All the designs are based on various patterns of basket weaving. I cut a large circle out of another pattern of the same DSP, and used that for the focal point. 


botanical textures suite of memory for new at su 2


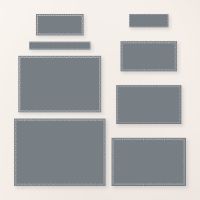
One thing I really liked about this set for scrapbooking, was the rectangular frames with the decorated die-cut edges. They come in many sizes and are perfect for mounting photos on. The small ones I had to modify to make more of a wallet-sized photo frame.
I've used some of the stamp set images to stamp and fussy cut some foliage images to add a little extra panache to the scene.

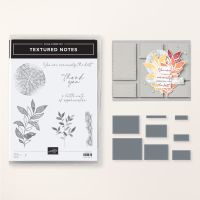
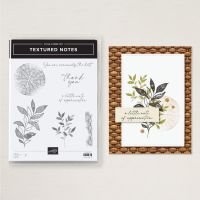
The sentiment is a little small for a large scrapbook layout, but I added it to a label die cut with the Textured Notes dies and popped it up with Mini-Dimensionals to make it a bit more noticeable.


botanical textures suite of memory for new at su 3


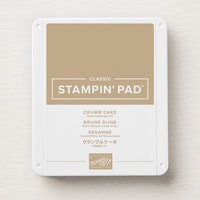
I stamped the basket weave in Crumb Cake and punched it out with my old 2" punch. I also cut a 2" swatch of Crumb Cake cardstock and embossed it with the Mini-Corrugated 3D Embossing Folder, adding a lot more texture to the project. I used the same embossing folder to make a banner for the top left out of Crumb Cake cardstock.
I hope you enjoyed this memory keeping project made with the Botanical Textures suite. Please take a moment to comment at the bottom of this post and let me know how you liked my project or ask me a question about the technique used. Don’t forget to scroll back up and keep hoppin’ with us! – Thank you!
Keep Creating!
Heather Cooper

Please contact your Stampin’ Up! demonstrator if you have any questions or to make a product purchase. If you do not have a demonstrator, I would be happy to answer any questions about products, or the techniques shown here.


Here's the list of bloggers in our New At SU April Blog Hop to help you keep on track: 

Product List

Wednesday, June 21, 2023

Reach for the Stars for New at SU June Blog Hop

2023 hop banner

Welcome to our June NEW AT SU! Blog Hop! We love to share creative card ideas from Stampin' Up! with you. Today we have projects featuring kids cards using new 2023 - 2024 Annual Catalogue products. June is a big birthday month in our family, with 3 grandchildren having birthdays in June! One of them is a fan of space flight so I was lucky enough to be able to use the Reach for the Stars bundle to create a birthday card for them.

reach for the stars for new at su 1

For this card, I used a variety of products from the Star Gazing Suite, including the stamped images and a sentiment from the Reach for the Stars stamp set, the Star Gazing 12" x 12" Designer Series Paper, which formed a background layer as well as provided die cut images, and the Reach for the Stars dies for die cutting not only the stamped images, but also the planets on the DSP.

reach for the stars for new at su 2
  • I started with Blackberry Bliss as my base and added a panel of the Star Gazing Designer Series Paper in a purple/red shade.
  • I stamped the rocket and the space guy in Memento Ink on Basic White cardstock then die cut them using the Reach for the Stars Dies.
  • Using the DSP pattern with all the red/orange/purple planets, I die cut a ringed planet and a smaller round one. To die cut the ringed planet, you first have to die cut the planet with the round die, then, cut the rest of the ring with the ring die. That part gets glued on after the planet itself is glued down.
  • The space ship and astronaut were mounted on Dimensionals. I used black. Parts that overhung the edge of the DSP were trimmed off.
  • I stamped the sentiments in Blackberry Bliss on Basic White, then used the Banners Pick-a-Punch to create the banner you see.
reach for the stars for new at su 3

I hope you enjoyed this project made with Reach for the Stars bundle available in the new Annual Catalogue, and the Stargazing DSP! It's a great design for kids!
Please take a moment to comment at the bottom of this post and let me know how you liked my project or ask me a question about the technique used. Don’t forget to scroll back up and keep hoppin’ with us! – Thank you!
Keep Creating!
Heather Cooper

Please contact your Stampin’ Up! demonstrator if you have any questions or to make a product purchase. If you do not have a demonstrator, I would be happy to answer any questions about products, or the techniques shown here. 

Here's the list of bloggers in our New At SU June Blog Hop to help you keep on track: 


Product List

Wednesday, January 18, 2023

Adorable Owls Project Combo from Sale-A-Bration

new at su blog hop

Welcome to the New Year and our January NEW AT SU! Blog Hop! We love to share creative card ideas from Stampin' Up! with you. Today we have projects featuring the rewards from the new 2023 Sale-A-Bration Brochure. I love the Adorable Owls stamp set and was quick to get my name in to claim it for my project! Here's what I did with it:

adorable owls project combo from sab 1

I used all three owl images in the Adorable Owls Cling Stamp Set for a birthday card and little treat box and paired them with the Dandy Designs Designer Series Paper, another Sale-A-Bration Reward.
Let's first look at the card:

adorable owls card from sab

  • Starting with the Mango Melody card base, I added a 5 1/4" x 4" panel of Poppy Parade at an angle and a slightly smaller panel of the Dandy Designs DSP at the opposite angle. The DSP's measurements are 5 1/8" x 3 7/8".
  • On a piece of Basic White cut at 4 1/2" x 3 1/4", I stamped two of the three owl images in Memento Ink. The third image, on the right, I wanted to have reversed so its wing would point at the owl in the birthday hat. To do that, I stamped the image in Memento ink on a piece of acrylic and then used that to stamp onto the cardstock. The image was not really strong and crisp, so I used a fine tip black marker to go over the outline of the image.
  • I used Stampin' Blends to colour in the owls. I used the Crumb Cake Combo for the Owls' bodies and heads, Pale Papaya for beaks, feet, inside of ears and the party hat, Poppy Parade for the bowtie, and Tahitian Tide for the beautiful eyes!
  • I stamped the sentiment in the top right corner. I masked the bottom of the Hoot! Hoot! sentiment and added the bottom sentiment instead.
  • I wanted some more Poppy Parade in the design, so I used the dark Poppy Parade Stampin' Blends marker to colour a length of White 3/8" Glittered Organdy ribbon and tied a bow to add with a glue dot. It dries so quickly with the alcohol ink and adds a party feel.
  • The envelope has another owl stamped on the front. To colour it, I inserted an empty Dimensional sheet inside before using the Blends markers so they wouldn't bleed through. 
  • I traced around the flap on the DSP and cut it out, then glued onto the envelope flap for a custom look.
Now, let's take a look at the little treat box:

adorable owl treat box for sab
  • The bottom of the box is made from a 5 1/8" square of Poppy Parade cardstock scored on all four sides at 1 1/2".
  • The lid is made from a 4 1/2" square of Dandy Designs DSP scored on all four sides at 1 1/8".
  • The next photo shows where to make the cuts for the boxes and where to fold (the Basic White represents the bottom and the Very Vanilla represents the lid):
Cut on the dotted lines and fold on solid lines.
  • After folding and cutting, the next photo shows where to add the Tear & Tape:
add tear & tape
  • Notice that I bevelled my cuts each time, cutting a tiny wedge instead of just a straight line. The Tear & Tape is applied next to each fold and along the outside adjacent to the fold.
  • The next two photos show how to assemble the box shapes:
assemble the box 1

assemble the box 2


  • Tuck one flap in behind the length of the next side and adhere with the Tear & Tape. Make sure you have a right angle at the corner.
  • Continue this step for the other 3 corners. The lid should fit easily over the box bottom.

box for sab
  • I stamped the owl image on Basic White cardstock and coloured it in with Stampin' Blends as described above. Then I fussy cut it out.
  • I created a tower of three Stampin' Dimensionals and added the owl, fastening it by its head. I added a glue dot to the bottom of the owl and secured the bottom right on the top of the box so it would display on an angle.
  • I stamped the sentiment on Basic White and die cut it with the smallest of the Tailor Made Tag dies. I added it to the box by tying it around the owl with linen thread.

I hope you enjoyed this trio of projects made with the Adorable Owls stamp set and the Dandy Designs DSP, both rewards you can earn free with a $60CAD or $120CAD purchase respectively.

Please take a moment to comment at the bottom of this post and let me know how you liked my project or ask me a question about the technique used. Don’t forget to scroll back up and keep hoppin’ with us! – Thank you!
Keep Creating!
Heather Cooper

Please contact your Stampin’ Up! demonstrator if you have any questions or to make a product purchase. If you do not have a demonstrator, I would be happy to answer any questions about products, or the techniques shown here. 

Here's the list of bloggers in our New At SU January Blog Hop to help you keep on track: 

Product List