Showing posts with label B.Y.O.P. Stamp Set. Show all posts

Friday, August 12, 2016

Thank You with Touches of Texture


One of the stamp sets that caught my eye from the beginning in the Annual Catalogue was the Touches of Texture stamp set, but I haven't been able to use it yet and that has bothered me a lot. I've reached for it many times, but for one reason or another, it hasn't quite fit in with my plans. I decided that was going to come to an end this week. I had another batch of customer thank you cards to make, so I got out a set of Note Cards and Envelopes (Whisper White) and my Touches of Texture and got to work! 

(By the way, I would normally be doing a Design Team Sample for As You See It Challenges, but our blog has had a serious hack in the past week, so that we can't even access it and fixing it is beyond our capabilities. We have handed it over to the pros and are hoping that we can get it up and running again within the next week, but we really have no idea how long it will take. You've got to wonder what makes people do such destructive things! We are so sorry for the inconvenience to all our participants and hope you'll bear with us.)

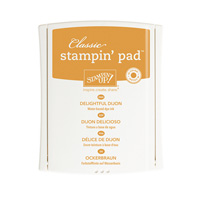
I have always thought it would be an ideal set for an emboss resist collage stamping card and so I decided to use that technique, and I was inspired to by some samples in the new Holiday catalogue to go with a more fall like palette and chose Delightful Dijon, Early Espresso and Crumb Cake for one set, and Perfect Plum (!), Elegant Eggplant, and Wisteria Wonder for another set. When was the last time you used Perfect Plum? It's been awhile for me. Here's a closer look:


  • The sentiment is from the B.Y.O.P. stamp set and was stamped in Early Espresso here. The snarl of alphabet letters in the center of the embossed image was also stamped in Early Espresso.
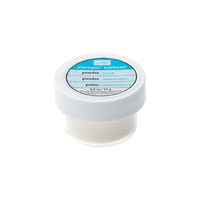
  • The splatter was stamped first and I used Crumb Cake. It's one of the textures in Touches of Texture. I then took the solid flower stamp and stamped it over the alphabet center with Versamark Ink, covered it with Clear Stampin' Emboss Powder and heat set it with the Heat Tool.
  • Using a Stamping Sponge and Delightful Dijon ink I sponged over the embossed flower starting with darker colour in the center and getting lighter as I worked my way out. You can still see the splatters and alphabet letters through the clear embossing.
  • I used the 5/8" Burlap Ribbon, cut in half length-wise and tied in simple knot to add a finishing touch to the card.
  • This card is done the same way, just substituting the Elegant Eggplant, Wisteria Wonder and Perfect Plum for the Early Espresso, Crumb Cake and Delightful Dijon, in that order.


I spent this week watching the Olympics, sorting out my new Holiday catalogue pre-order, and getting my house ready for my kids' visit in two more weeks. Each summer we try to have at least one weekend where we all get together at once and it's getting more challenging, as the families grow, to find suitable sleeping arrangements and variety of activities for everybody! But I think we've got it figured out this year. I don't know if you know it, but we have a castle! Yes, we do. We won it when our girls were almost grown out of the playhouse stage and since then it's been a glorified shed, just waiting for the grandchildren to come along. Now that they finally have, it has fallen into disrepair and needed a face lift. So my hubby got to work this week and here is the result:


It's watertight and has a proper floor and even an electric light! I think it might make a fun spot for someone to sleep in for one night at least, don't you?


We've come up with a good game for the adults to play after the little ones have gone to bed.

You can watch the video where we got the idea by clicking on this link here. (Maybe just watch the first 5 minutes. After that it starts to get a bit crude) I've ordered and received the dental lip retractors and we just have to make up some funny phrases using a lot of letters like m, b, v and p. Should be fun!


I hope your weekend will be enjoyable. I have my work cut out for me. A church group I belong to, which is looking to sponsor a refugee family, is planning a peach pie fundraiser. Our goal is 100 peach pies. I'm going to be peeling a LOT of peaches!  See you Monday!


Click on the links below to take you to my On-Line Store, where you can read about, look at, and purchase if you wish, the products used to make this card today.


Product List

Friday, May 1, 2015

BYOP for As You See It Challenges


I have to chuckle at the title of this post! I originally wrote BYOB! It's been that kind of week, and I actually thought that that was the name of the stamp set I used. In actuality, it is BYOP - Buy Your Own Present, a stamp set to use when you give a gift card, which is a very practical kind of gift these days! There are all sorts of situations when a gift card is the best solution, and I think they are all featured in this great set. One of them is Grad, and when I saw As You See It Challenges colour swatch this week (Thanks, Desireé!) I immediately  thought of a grad gown.


And it is that time of year, isn't it? Grads are walking across the stage everywhere to claim their diplomas wearing all sorts of cool regalia. Here's my version:


  • This may look easy to achieve, but let me tell you, it isn't! To get the same shaped V in every colour of cardstock used here, but just a little offset from the others was not a piece of cake. To do it, I cut 4 colours of cardstock in equal sized 3 3/4" x 5" pieces. I then placed them together, aligned horizontally, but each offset about 1/4" from the next vertically. I found the middle of the top edge and cut a slit the length I wanted the V to go then made marks on the top edge equidistant from the center on either side. I cut from the marks on the edge to the bottom of the slit to make the Vs. The problem turned out to be that I couldn't cut through all four layers at once neatly. Once I had the marks, I had to separate the pieces and cut individually.  When I finally had each piece neatly cut, I put them all together but this time, I aligned them vertically as well and achieved the succession of Vs that you see in the picture. 
  • After adhering all the pieces, I rounded the top corners using the Project Life Corner Rounder Punch. I used it as well to round the top of the tie, and I used the tip of the tiny star punch from the Itty Bitty Accents Punch Pack to create the indents below the knot of the tie.
  • I used the Squares Collection Framelits for the Grad Cap and I made the tassel using the tassel from the Balloon Framelits. Again, I put three colours of cardstock together but offset about 1/8" from each other horizontally and used the framelit to die cut the tassel. It's attached to the cap with a glue dot.
  • The sentiment, from BYOP Stamp Set, was also difficult to achieve neatly. I stamped the Congratulations first in Real Read ink, masking the Grad using tape. I cleaned the stamp well, masked the Congratulations using tape again, and stamped the Grad with Versamark ink. I was careful to use the Embossing Buddy well before stamping with Versamark to try and keep the Black Stampin' Emboss Powder to just the word "Grad". I heat set it and coloured it in with the Tempting Turquoise Stampin' Write Marker. It took me 3 tries to get this right!
  • I die cut the sentiment using the Apothecary Accents Framelits, which are retiring June 2, and I cut out the same shape in Daffodil Delight cardstock and used it as a shadow for the sentiment.
There you have it. What could you create with those three colours? Why not play along if you have some crafting time this weekend?


#StampingforNepal

This weekend, I'm hoping to do some fundraising for aiding the relief effort in Nepal. On Sunday, I will post a special blog post with some projects I have put together just for this purpose. It may include individual cards, packets of cards and some home decor items. I will post them on my blog and I hope to get people to bid on them as for a silent auction. The  auction deadline will be Thursday evening at 11:00 pm. All the proceeds will be donated to the Red Cross for Nepal.

If you would like to help out, please submit a bid or two and you will not only get a nice papercrafting project, but all bidders will be emailed a free photo tutorial for this card:


Please check back on Sunday, to check out the projects you could bid on.  I don't know if this will catch on with other demonstrators, but even if it doesn't I want to go ahead with the effort, to do something.  If you are a papercrafter, see if you can come up with a fundraiser of your own, of any kind and post your fundraiser and the amount you are donating to the Nepal charity of your choice on Facebook using the hashtag, #StampingforNepal, and let's see what we can do!  Stamper's are awesome people!


Click on the links below to take you to my On-Line Store, where you can read about, look at, and purchase if you wish, the Stampin' Up! products used to make this card today!


Product List