Tuesday, November 13, 2012

Hurtling Train

Does anyone else out there feel as if they are in a speeding train hurtling toward December 25?  Or maybe it's in a plane nosediving directly at Christmas?  I probably say this every year but every year it is truer:  Christmas comes faster and faster all the time.  I can't believe it's almost here!  I just put my capris away for the year.  I just tucked my flip-flops in the closet!  How can it be almost Christmas?

Oh, well, Christmas will come whether I'm ready for it or not, so I might as well......
stamp another Christmas card!


This one was inspired by the MOJO Monday sketch #267 by Julee Tilman.  I just felt like it had a vintage feel, and I hadn't used my Christmas Lodge stamp set enough yet this year.  Or my red glimmer paper either!


The base is Cherry Cobbler card stock, with a piece of Candlelight Christmas DSP as the back panel.
The next layer is more Cherry Cobbler card stock with some Early Espresso Core'dinations card stock embossed with the Woodgrain embossing folder.  I punched one edge of the Red Glimmer paper with the Scallop Trim punch and added a layer of Very Vanilla, stamped with the lodge from the Christmas Lodge set in Early Espresso and the sentiment from Come To Bethlehem in Cherry Cobbler.  I tied a little fork bow using Real Red 1/8" taffeta ribbon and added it to the panel, then mounted it on dimensionals to give it some vertical interest.  Finally, I used the Snow Flurry BigZ die to die cut the two smaller snowflakes, combined them with glue dots and adhered them to the project.  I think red and brown is my favourite Christmas combination - it looks so warm and rustic.


And that's my card for today!  Focus on your Christmas tasks, but don't take any hurtling trains!


Stamps: Christmas Lodge (w123767; c123769); Come to Bethlehem (w118732; c120591)
Paper:  Cherry Cobbler (119684) and Very Vanilla (101650) card stock; Early Espresso Core'dinations card stock (127848), Candlelight Christmas Specialty DSP (126901), Red Glimmer Paper (121790)
Ink:  Classic Stampin' Pads in Early Espresso (126974) and Cherry Cobbler (126966)
Accessories:  1/8" Real Red Taffeta Ribbon (119251)
Tools:  Snow Flurry BigZ die (127813); Scallop Trim Punch (118402), Woodgrain Embossing Folder (127821)
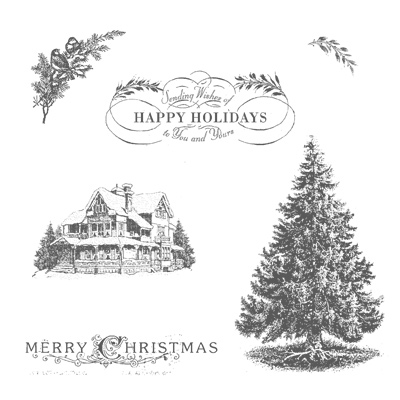

Christmas Lodge


Monday, November 12, 2012

New Video

It's SOOO late.  I stayed up chatting and previewing the new cattie with my upline and sidelines!  Oh, my heavens - it is amazing!!! and huge!!!  There are so many cute, new products and papers and stamps and embellishments!  I can hardly wait to start ordering in December so I can start to show you all the neat things!  You're gonna love it!  Let me know if you want to have one mailed to you.  And you've got to become a demonstrator, so you get these awesome first peeks!

But I finally finished a new video, a tutorial for making Christmas illuminated easel cards like these:


So here is the video.  Enjoy!
 

Saturday, November 10, 2012

We Remember...

Tomorrow is Remembrance Day in Canada.  It's a day to take the time to remember.  To remember the courage of a past generation, fighting for the rights we all take for granted so often.  A Canadian soldier in WWI wrote these words:

In Flanders Field

In Flanders fields the poppies blow
Between the crosses, row on row
That mark our place; and in the sky
The larks, still bravely singing, fly
Scarce heard amid the guns below.
We are the Dead. Short days ago
We lived, felt dawn, saw sunset glow,
Loved and were loved, and now we lie
In Flanders fields.
Take up our quarrel with the foe:
To you from failing hands we throw
The torch; be yours to hold it high.
If ye break faith with us who die
We shall not sleep, though poppies grow
In Flanders fields.
~ John McCrae (1872-1918)

My card today honours those who gave their lives in two World Wars and in many conflicts since.  It includes my own father, who was wounded in France and carried the scars until he died a few years ago.


This is a hybrid card, using some elements created on My Digital Studio 2, including the cross and the sentiment.  I used the Pleasant Poppies background stamp, inked in StazOn Jet Black and embossed with clear embossing powder, then watercoloured using an Aqua Painter and Cherry Cobbler and Sahara Sand ink.

When I saw several beautiful photos on Facebook today of the poppies in Flanders Fields, I was inspired to create this card.  Of course, I can't do the real poppies justice, but I think the card gives the right feel of honour and respect.

Dynamic Duos challenge this week is a subtle combination of Sahara Sand and Cherry Cobbler, the perfect colours for this card.

 
I used Crosses of Hope and Words of Courage Stamp Brush sets for the MDS2 parts of the card, but added an Antique brad and some metallic brads to both.  I hand-cut several poppies as well and added them for the look of 3D poppies, blowing in the wind.
 
 
I hope you like the card, and I hope you pay tribute this weekend to some aging heroes and to the concepts of courage and sacrifice.  Don't let their deaths be in vain.


Stamps: Pleasant Poppies (w126480; c129499); Crosses of Hope (129595); Words of Courage (130858)
Paper: Sahara Sand (121043), Cherry Cobbler (119685) and Whisper White (100730) cardstock
Ink: Classic Stampin' Pads in Cherry Cobbler (126966) and Sahara Sand (126976); StazOn Jet Black (101406)
Accessories: Antique Brads (117273); Metallic Brads (119741); Clear Stampin' Emboss Powder (109130)
Tools: Aqua Painter (103954); Heat Tool (129053); Lacey Brocade Embossing Folder (127819)
Pleasant Poppies Stamp
 Crosses of Hope Stamp Brush set


Thursday, November 8, 2012

Pacific Sunset

No, I'm not posting from a South Pacific Island (I wish!!).  This is the name of a maple tree in our back yard - a Pacific Sunset maple, and from this photo, I think you can see why.

 
Aren't the colours lovely?  So warm and glowing!  This is what I see everyday when I look out my kitchen window.  This tree actually inspired my next card:


I used the Mojo Monday #266 sketch for this one, designed by Julee Tilman, and it created a lovely, balanced design.


The palette, taken from the autumn colours on my maple are Pumpkin Pie, So Saffron, More Mustard and Cajun Craze, with a little Soft Suede thrown in there for good measure!  And it uses a sentiment from the Trust God stamp set, to comply with The Paper Players' Challenge #120, where the theme is "Give Thanks".  Thanks, Ann Schach, for that topic, because even though Thanksgiving is over here in Canada, it is still an awesome idea to be grateful everyday!

 
The stamp set I used for this card is a favourite of mine, and Ann Schach's too, I'd say:  French Foliage.  It has such a lovely vintage feel to it.  I started with a card base of Pumpkin Pie and added a piece of So Saffron embossed with the Square Lattice embossing folder.  I added a vertical flag from some Orchard Harvest DSP mounted on Pumpkin Pie, then stamped the rectangle panel with images from French Foliage.  I distressed and sponged the edges and mounted it on Cajun Craze.  The small square panel is a piece of Polka Dot Parade DSP on Pumpkin Pie.  I punched out a circle of Very Vanilla using a 1 3/4" Circle punch and backed it with a 2 3/8" Scallop Circle punched out of Cajun Craze.  The image is also from French Foliage and the sentiment, again, from Trust God.  The horizontal flag is made from Victorian Crochet Trim and I added a Naturals Designer Button threaded and tied with some linen thread.


So try this one out - great for lots of occasions!  Thanks for dropping by!

Stamps:  Trust God  (w126700; c126702), French Foliage (w120845; c121166)
Paper:  Pumpkin Pie (105117), So Saffron (105118), Cajun Craze (119684) and Very Vanilla (101650) card stock;  Orchard Harvest DSP(126895); Polka Dot Parade DSP (126902)
Ink: Classic Stampin' Pads in Soft Suede (126978), Early Espresso (126974), Pumpin PIe (126945) and More Mustard (126964)
Accessories:  Victoian Crochet Trim (118481); Naturals Designer Buttons (127554) tied with Linen Thread (104199)
Tools:  Stampin' Sponge (101610); Square Lattice Embossing Folder (119976); 1 3/4" Circle Punch (119850); 2 3/8" Scallop Circle punch.(118874)


Tuesday, November 6, 2012

Tinsel Tales

My hubby and I have this running argument around this time of year.  It's about tinsel.  When I was growing up, the Christmas tree wasn't decorated until it had tinsel.  I like the way it twinkles and glitters and reflects the Christmas lights!  My husband HATES tinsel!  He especially hates how it mysteriously migrates....from the tree to the least likely places all over the house: the closets; the bathroom; the cats' food dish.

 I have to admit, he has a point, so usually we do NOT tinsel the tree.  So I have to get my glitter quota some other way!  It's probably one of the reasons I like making Christmas cards so much.  I wanted to make a swap card for my up line's Team Meeting and decided to use the Dynamic Duo's Colour Challenge: 


The challenge was to use Raspberry Ripple and Gumball Green, a really festive colour combo.


I had a question, though.  I wanted, with every fibre of my being, to include some Silver Glimmer paper in my design, but I didn't know if it counted as a neutral.  So I asked the DT at Dynamic Duos that very question, and just got my answer back!  It was counted as Basic Gray would be - a neutral!  I wanted to shout, "YES!" and I thought that could be another argument for tinsel on the tree!  "But Dear, tinsel is a neutral!  It just enhances the colour on the tree already!".....Nope, don't think he'll go for it!
Anyway, I had lots of fun with it on this card, which features the Spotlight Technique.  I stamped the image from the Bells & Boughs stamp set with Jet Black StazOn on Whisper White.  Using the 1 3/4" Circle punch, I punched out a circle of the image and water coloured it using Stampin' Write markers in Raspberry Ripple and Gumball Green and Blender Pens.  I die-cut a 2" circle of Raspberry Ripple using the Circles #2 die, matted the coloured piece of the image and adhered it back onto the image, creating a coloured highlight of the black and white image.


The rest of the card consists of a panel of silver glimmer paper, matted in Basic Gray and embellished with a bow of Stitched Satin Ribbon in Raspberry Ripple, a basic white background with the sentiment, also from Bells & Boughs, stamped in Raspberry Ripple.  The nice thing about the Spotlight Technique is that you don't have to watercolour the whole image.  The little snippet gives the picture for the whole stamp.

And that's pretty much the whole card!  Enjoy and thanks for dropping by.

Stamps:  Bells & Boughs (w120831; c121142)
Paper:  Silver Glimmer Paper (124005); Whisper White (100730), Basic Gray (121044) and Raspberry Ripple (126842) card stock
Ink:  StazOn Jet Black (101406), Classic Stampin' Pad in Raspberry Ripple (126859); Stampin' Write Markers in Raspberry Ripple and Gumball Green ( 2012-13 In Colour Collection 126856)
Embellishments:  3/8" Stitched Satin Ribbon in Raspberry Ripple (126845); Rhinestone Basic Jewels (119246)
Tools:  Blender Pens (102845); 1 3/4" Circle Punch (119850); Circles #2 Originals Die (114526)


Blender Pens
Silver Glimmer Paper
Bells & Boughs stamp set


Thursday, November 1, 2012

Little House Homespun

One of my favourite bits of children's literature is the Little House on the Prairies series by Laura Ingalls Wilder.  Not only did I read the books as a child, but I also read them to my girls as they were growing up, and we watched the TV series as well.  It really brought the pioneers' existence to life.  One of my daughters still reads the books from time to time.  I especially loved the Christmas stories because they were so different from our over-the-top celebrations.  Simple but meaningful!


The card I want to share with you today reminds me of Little House on the Prairie.  It has that homespun look to it, probably due to the Fan Fair DSP I used in the background.

 
I designed this card to participate in two challenges. Pals Paper Arts Challenge #146, is a colour challenge using Riding Hood Red, Very Vanilla and Crumb Cake - a very homespun combination in my mind. 
 
 
Then, the Paper Players Challenge #119 is a lovely sketch, and the two just work so nicely together.


I used the Water Colour Winter stamp set for the main image, but chose to go with crumb cake instead of the red which was too dominant already.  The colour was added with a little splash of Cherry Cobbler Dazzling Details. 


The horizontal panel was embossed with one of the Delicate Designs embossing folders and trimmed with 1/8" Taffeta Ribbon in Real Red.  The Very Vanilla panel backing it was punched with the Scallop Trim Border punch.  The vertical flag was scored with the Simply Scored Scoring Tool and sponged with some Crumb Cake ink to bring out the ridges it formed.

I'm quite pleased with the design and hope that the special people that I want to thank with this card will be pleased as well!  Did  you ever read the Little House on the Prairie Series or watch the television show?  Does this card make you think of homespun?  Let me know what you think.  I love to read your comments as they help me to get to know you better!  I feel like I'm communicating with real people and not just nebulous ether waves!  And if you like what you read, won't you join my site?

Excited to hear from all of you!

Stamps:  Watercolor Winter (w129724; c129727), Teeny Tiny Wishes (w115370; c127802)
Paper:  Riding Hood Red (111348), Crumb Cake (120953) and Very Vanilla (101650) card stock; Fan Fair Designer Series Paper(126918)
Ink: Classic Stampin' Pads in Crumb Cake (126975) and Riding Hood Red (126968)
Accessories: Dazzling Details Cherry Cobbler (125585); 1/8" Taffeta Ribbon in Real Red (119251)
Tools:  Delicate Designs embossing folders (127023); Window Frames Framelits Dies (129021); Scallop Trim Border Punch (118402)


Christmas Cascade

Halloween was very non-eventful here.  We live on a busy street, with a steep driveway and lots of stairs, which I'm sure is very daunting for the would-be trick or treater!  I didn't even get to enjoy my two little grandsons on their first Halloween, as they live so far away. 

But I got to see their costumes on Skype.  What would we do without Skype?  They were irritated to indifferent to wearing a costume this year.  I'm sure next year will be a different story!  Here they are:  Parker as Harry Potter and Kesten as a little fox!


Adorable, aren't they?

I have a card for you today!  Wonders!  It's a design I've planned for my Technique Night in November, where the theme is Fancy Folds.  This is one that I came across in my searches called a Waterfall Fold.

 
The way it works is that you pull down on the tab with the ribbon and the small panels with the snowflakes and ornaments on them fold up one by one and disappear down behind the tab.  Here's a couple of shots in action:


If you want to know more about the technique and how to make this card and two other fancy fold cards, then you've got to attend my Technique Night class this month.  You have two options:  Wednesday, November 7 or Thursday, November 8, both at my house at 7:00 pm.  You can register here for Wednesday or here for Thursday.
 
Stamps:  Ornament Keepsakes (w128048; c128051); Snowflake Soiree (w127922; c127925), Snow Swirled (w111690; c127799); Teeny Tiny Wishes (w115370; c127802)
Paper: Gumball Green (126840) and Very Vanilla (101650) cardstock; Snow Festival DSP (126908)
Ink: Classic Stampin' Pad in Cherry Cobbler (126966), Baja Breeze (126960) and Gumball Green (126861)
Accessories:   3/8" Stitched Satin Ribbon in Gumball Green (126848); 3/8" Brights Glimmer Brads (121006)
Tools:  Curly Label Punch (119851); generic hole punch; Word Window Punch (119857); Modern Label Punch (119849). Paper Piercing Tool (126189); Stampin' Pierce Mat (126199); Simply Scored Scoring Tool (122334)
 
 
Snow Festival DSP
 
Snow Swirled
Snow Flake Soiree


Ornament Keepsakes